Flawless Look: Concealer Application Guide for US Women
Anúncios
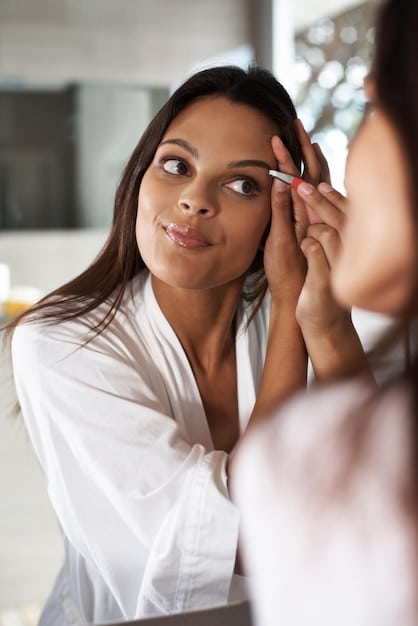
Achieving a truly flawless complexion hinges on expert concealer application, seamlessly blending away imperfections like dark circles, blemishes, and redness, thus elevating both daily makeup routines and special occasion looks for US women.
Anúncios
In the expansive and diverse world of beauty, mastering the art of concealer application is fundamental for many US women seeking to achieve a flawless look: the ultimate guide to concealer application for US women. Beyond simply covering imperfections, skillful concealer use can sculpt, brighten, and unify the skin tone, creating a refined finish that feels both natural and polished. This guide delves into the nuances of choosing the right product, mastering application techniques, and integrating concealer into a comprehensive beauty routine for lasting perfection.
Understanding the Basics: Your Concealer Toolkit
Before diving into application techniques, it’s crucial to understand the foundational elements of your concealer arsenal. This includes recognizing the various types of concealers available and understanding the tools that will help you achieve the most natural and effective results. Selecting the right product and implement can make a significant difference in your makeup outcome, moving beyond mere coverage to true complexion enhancement.
Anúncios
The market offers a diverse array of concealer formulations, each designed for specific needs and skin types. Knowing when to opt for a liquid versus a stick, or a cream versus a color corrector, is key to optimizing your application strategy and ensuring longevity.
Types of Concealers and Their Uses
Concealers come in various forms, each suited for different skin concerns and application preferences. Understanding these subtle distinctions empowers you to build a versatile makeup kit.
- Liquid Concealers: Offer light to full coverage and are versatile for most skin types, particularly good for under-eye areas due to their blendability and ability to resist creasing. Many formulations are hydrating, which is beneficial for dry skin.
- Cream Concealers: Provide medium to full coverage, often thicker than liquids. They are excellent for disguising blemishes and uneven skin tone, though they may require setting to prevent creasing, especially around the eyes.
- Stick Concealers: Highly pigmented and offer full coverage, ideal for targetted spot correction on blemishes or hyperpigmentation. Their solid form makes them convenient for precise application and touch-ups on the go, but can feel heavy if not blended well.
- Color Correctors: Used before traditional concealer, these utilize opposing colors on the color wheel to neutralize specific discoloration, such as green for redness (acne, rosacea) or peach/orange for blue/purple dark circles.
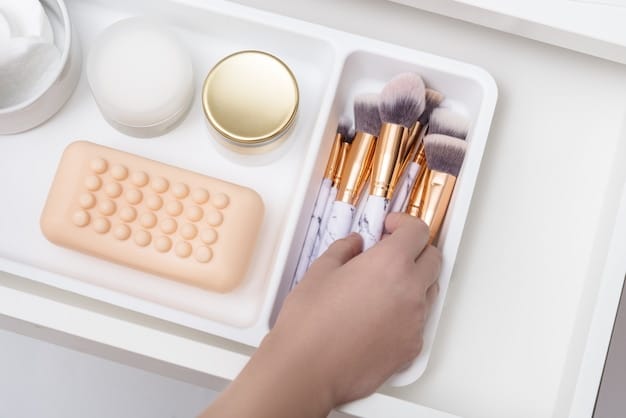
Beyond the actual makeup, the tools you use play an equally important role in achieving a seamless finish. Whether you prefer brushes, sponges, or even your fingertips, each method boasts unique advantages that can elevate your application game.
Essential Application Tools
The right tools can transform your concealer application, ensuring a smooth, natural-looking finish that seamlessly integrates with your skin. Experimenting with different tools can help you discover what works best for your specific needs and preferred texture.
- Beauty Sponges: Damp sponges are excellent for blending liquid and cream concealers, providing an airbrushed finish and diffuse coverage without harsh lines. The dampness helps prevent product absorption and creates a smoother transition.
- Concealer Brushes: Synthetic brushes with dense, soft bristles are ideal for precise application and blending, particularly for targeted spots or under-eye areas. Flat, tapered brushes are great for intricate work, while fluffier brushes are good for general blending.
- Fingertips: The warmth of your fingers can help melt the product into the skin, offering a natural finish and light coverage. This method is particularly effective for blending around delicate areas like the eyes, using a gentle patting motion.
Ultimately, selecting the combination of concealer type and tool depends on the specific imperfection you’re addressing, your skin type, and the desired level of coverage. A mindful approach to these basics lays the groundwork for impeccable application. With a well-chosen toolkit, you are equipped to tackle any complexion challenge, ensuring your skin looks its absolute best, ready to build upon with advanced techniques.
Mastering Shade Selection: The Key to Invisible Coverage
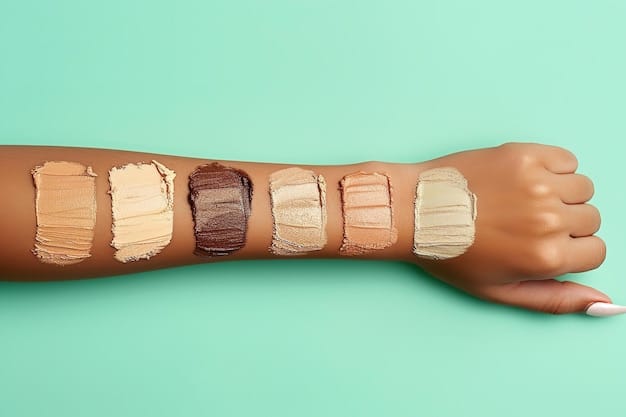
Selecting the correct concealer shade is arguably the most critical step in achieving undetectable coverage. A shade that is too light or too dark will draw attention to the very areas you wish to conceal, undermining your efforts. The goal is to find a shade that seamlessly integrates with your skin tone, or subtly enhances it, depending on the area of application. This subtle art involves understanding your skin’s undertone, the specific area you’re concealing, and the effect you aim to achieve.
Many individuals find themselves overwhelmed by the vast array of shades available, leading to common mistakes like choosing a shade that’s too cool or too warm. A systematic approach to shade selection, however, demystifies the process, turning it into an empowering step in your beauty routine.
Matching Concealer to Your Skin Tone and Undertone
Your skin’s natural undertone—whether warm, cool, or neutral—plays a pivotal role in determining the most harmonious concealer shade. Misidentifying your undertone can result in an ashy or overly orange appearance, particularly under artificial lighting. Consider these factors when making your selection:
- For Dark Circles: Typically, you’ll want a shade that has a peach or orange undertone to neutralize blue/purple hues. Following this, a shade that is 1-2 shades lighter than your foundation can brighten the under-eye area, creating a well-rested appearance.
- For Blemishes and Redness: The most effective approach is to select a concealer that matches your skin tone exactly or is very slightly warmer. This prevents the spot from appearing as a stark, lighter patch. For redness specifically, a green-tinted color corrector can be applied first to neutralize the color before your skin-matching concealer.
- For Spot Concealing: A shade that perfectly matches your foundation is ideal for covering isolated blemishes or areas of hyperpigmentation on the rest of your face. This ensures that the concealed spot blends seamlessly into your overall complexion without standing out.
Testing concealer shades effectively demands strategic application. While swatching on your wrist might work for foundation, the skin on your face, particularly around the eyes and on areas with blemishes, can have different undertones and color variations. A true test involves applying a small amount directly to the area you intend to conceal.
Testing and Blending for the Perfect Match
Proper testing is non-negotiable for finding your ideal concealer match. It’s often recommended to test colors in natural light rather than fluorescent store lighting, which can distort colors and lead to incorrect choices. Applying a small amount and letting it sit for a few minutes can also reveal how the product oxidizes and settles on your skin.
- Under-Eye Area: Apply three small dots or a thin line directly under your eye, near the inner corner, middle, and outer corner. Gently tap and blend with your ring finger or a damp beauty sponge. Observe if it brightens without looking stark white or adds a gray cast.
- For Facial Imperfections: Dab a tiny amount of concealer directly onto the blemish or discolored area. Blend lightly around the edges, letting the center remain covered. Check if the product disappears into your skin, effectively camouflaging the imperfection without creating a noticeable patch.
- Natural Lighting Check: Always step outside or stand near a window to observe the concealer in natural daylight. This is the most accurate way to assess if the shade truly blends seamlessly with your skin, making it virtually undetectable.
By investing time in mastering shade selection, you lay the groundwork for an elevated makeup application. An adept shade choice not only conceals but also enhances your natural beauty, ensuring a finish that is both flawless and authentically yours.
Step-by-Step Application Techniques for Different Concerns
Once you’ve equipped yourself with the understanding of concealer types and have mastered shade selection, the next crucial step is perfecting your application technique. The method of application varies significantly depending on the area you’re targeting and the concern you’re addressing. Applying concealer strategically ensures maximum efficacy without creating an unnatural or “cakey” appearance. Each area of the face demands a delicate touch and a specific approach to achieve a seamless, natural-looking finish that endures throughout the day.
From brightening tired eyes to spot-treating blemishes, precise application is key. This section will guide you through tailored techniques for the most common concealer concerns, ensuring your efforts yield polished results.
Techniques for Brightening Under-Eyes
Dark circles are a common concern, and the right concealer application can dramatically brighten and refresh your appearance. The goal here is to create an illusion of light and smooth the delicate skin, avoiding any caking or creasing during the process.
- The Inverted Triangle Method: Instead of just applying concealer along the lash line, create an inverted triangle shape under your eye. The base of the triangle should lie under your lash line, and the point should extend down towards your cheek. This method helps to brighten a larger area of the face, pulling attention upwards and creating a more lifted look.
- Gentle Blending: Using your ring finger or a damp beauty sponge, gently tap the product into the skin. Avoid rubbing, as this can pull at the delicate skin and displace the product. Continue tapping until the concealer is seamlessly blended into your foundation or natural skin.
- Setting: To prevent creasing, especially if you have fine lines, lightly dust a translucent setting powder over the concealed area using a fluffy brush. This locks the concealer in place without adding texture.
Concealing Blemishes and Redness
Targeting blemishes and areas of redness requires precision and a light hand to ensure effective coverage without highlighting the imperfection. The aim is to make the blemish disappear into your skin, rather than merely cover it with a thick layer of product.
- Precise Application: Using a small, firm brush or a clean fingertip, apply a tiny amount of concealer directly onto the blemish. Ensure the application is exactly on the spot and not spread too widely around it.
- Feathering the Edges: Gently tap and feather the edges of the concealer outwards, blending it seamlessly into the surrounding skin. The center of the blemish should retain the most coverage, while the edges should melt into your complexion.
- Layering if Necessary: If initial coverage isn’t sufficient, allow the first thin layer to set for a minute or two before adding another thin layer. Building coverage gradually prevents a cakey appearance.
Contouring and Highlighting with Concealer
Concealer isn’t just for covering; it’s also a powerful tool for sculpting and adding dimension to your face. By using shades lighter and darker than your natural skin tone, you can subtly highlight and contour, enhancing your facial features.
- Brightening Areas: Apply a concealer 1-2 shades lighter than your skin tone to areas you wish to highlight, such as the bridge of your nose, the center of your forehead, your cupid’s bow, and the center of your chin. Blend well for a subtle lift and glow.
- Defining Features: While less common for everyday concealer use, some prefer to use a darker concealer (1-2 shades darker than skin tone) to create subtle shadows, mimicking the effects of contouring powder, along the hollows of your cheeks or jawline.
- Seamless Blending: Whether highlighting or contouring, thorough blending is paramount. Use a damp beauty sponge or a denser brush to ensure there are no harsh lines, creating a soft, natural looking sculpt.
Each of these techniques, when executed with care and precision, contributes to a polished, flawless appearance. Practice is key to mastering these methods, allowing you to adapt them to your unique facial structure and skin type, ultimately elevating your overall makeup artistry.
Advanced Concealer Tips and Tricks for Longevity
Beyond the foundational application techniques, a truly flawless and long-lasting concealer look hinges on incorporating advanced tips and tricks. These often overlooked details can significantly impact how your concealer wears throughout the day, preventing common issues like creasing, fading, or caking. The goal is not just to apply concealer, but to ensure it integrates seamlessly with your skin and withstands the challenges of daily life, from humidity to wear and tear.
From proper skin preparation to innovative setting methods, these techniques elevate your concealer game from good to truly exceptional. They ensure your careful application remains pristine, offering reliable coverage hour after hour.
Prepping Your Skin for Optimal Concealer Application
The canvas on which you apply your concealer is as important as the product itself. Well-prepared skin allows concealer to glide on smoothly, adhere better, and lay without emphasizing texture or dryness. Neglecting skin prep can lead to uneven application and reduced wear time.
- Hydration is Key: Ensure your skin, especially the under-eye area, is well-hydrated. Use a lightweight eye cream or moisturizer that absorbs quickly. Hydrated skin will prevent the concealer from clinging to dry patches or settling into fine lines.
- Primer Use: While not always necessary, an eye primer or a facial primer applied to specific areas where concealer will go (like around the nose for redness) can create a smoother surface and extend wear. Choose a primer compatible with your concealer formula.
- Allow Products to Absorb: Give your skincare products and primer a few minutes to fully absorb into your skin before applying concealer. Applying over wet products can cause the concealer to pill or streak.
Preventing Creasing and Caking
Creasing under the eyes and caking on blemishes are common frustrations that can detract from an otherwise flawless complexion. These issues often arise from either using too much product or not setting the concealer properly. Addressing these requires a strategic approach.
- Less is More: Always start with a small amount of product. It’s much easier to build up coverage than to remove excess without disturbing the rest of your makeup. Thin layers blend more seamlessly and are less prone to creasing.
- Baking or Setting: After blending your under-eye concealer, lightly press a generous amount of translucent setting powder onto the area using a damp sponge. Let it “bake” for 3-5 minutes, allowing excess moisture to be absorbed, then dust away the remainder with a fluffy brush. For blemishes, a light dusting of powder is usually sufficient.
- Warmth and Blending: Use the warmth of your ring finger or a clean, damp sponge to gently press the concealer into the skin right before setting. This helps to melt the product into your skin, reducing the likelihood of creasing.
Long-Lasting Wear: Setting Your Concealer
Setting your concealer is not just about preventing creasing; it’s about extending its wear time and ensuring it looks fresh throughout the day. The right setting technique locks the product in place, creating a durable finish.
- Translucent Setting Powder: This is the gold standard for setting concealer. Choose a finely milled, translucent powder to avoid adding color or weight. Apply sparingly to areas where you’ve used concealer, focusing on the under-eye area and any oily spots.
- Setting Sprays: Once your entire makeup look is complete, a setting spray can help to meld all products together, providing a natural finish and enhancing longevity. Look for formulations that are hydrating or mattifying, depending on your skin type.
- Strategic Touch-Ups: Rather than reapplying full layers, gently blot any excess oil with a tissue throughout the day. If minor creasing occurs, gently tap the area with a clean finger or sponge before adding a tiny amount of powder if needed.
By integrating these advanced tips into your routine, you can significantly enhance the efficacy and longevity of your concealer application. These techniques are not just about covering imperfections but about mastering the art of creating a lasting, naturally flawless complexion that stands the test of time.
Common Concealer Mistakes and How to Avoid Them
Even with the best products and intentions, common pitfalls in concealer application can detract from an otherwise flawless look. These mistakes often stem from misunderstanding product properties, overapplication, or using incorrect techniques for specific concerns. Identifying and rectifying these errors is crucial for achieving truly seamless coverage that enhances your natural beauty rather than drawing attention to imperfections. A proactive approach to avoiding these blunders will save time and ensure a more polished outcome.
From choosing the wrong shade to applying too much product, these simple adjustments can dramatically improve your concealer game, transforming your routine from frustrating to effective.
Choosing the Wrong Shade or Undertone
This is perhaps the most common mistake, leading to a concealer that either looks streaky, ashy, or creates a stark contrast against your skin. A mismatch in shade or undertone sabotages the very purpose of concealer.
- Too Light for Blemishes: Using a concealer that is too light on blemishes or hyperpigmentation will draw attention to them, making them appear more prominent instead of camouflaged. Always match a blemish concealer exactly to your skin tone or foundation.
- Too Dark or Wrong Undertone for Under-Eyes: A concealer that is too dark will fail to brighten, while one with the wrong undertone (e.g., too yellow for cool undertones) can make dark circles look gray or ashy. Opt for a peachy/orange corrector followed by a concealer 1-2 shades lighter than your skin tone with a complementary undertone.
- Testing in Natural Light: Always test concealer shades on your face, not your arm, and check the results in natural daylight to ensure an accurate match.
Over-Applying or Improper Blending
The temptation to layer on more product for perceived better coverage can quickly lead to a cakey, unnatural finish, especially in areas with fine lines. Improper blending leaves visible lines and patches, defeating the purpose of seamless coverage.
- Applying Too Much Product: Heavy layers of concealer tend to crease, look heavy, and can even highlight texture instead of concealing it. Start with a tiny amount and build thin layers only if needed.
- Not Blending Thoroughly: Visible lines around the edges of concealed areas indicate poor blending. Always feather out the edges of the concealer, ensuring it melts seamlessly into your skin or foundation. Use gentle dabbing or tapping motions.
- Rubbing Instead of Tapping: Rubbing concealer can sheer out the product, move it around, and irritate the delicate skin, particularly under the eyes. Always use gentle tapping or pressing motions to blend and settle the product.
Forgetting to Set Your Concealer
Failing to set your concealer, especially in areas prone to creasing or oiliness, is a recipe for short-lived coverage. Unset concealer is more likely to migrate, crease, and fade, requiring frequent touch-ups throughout the day.
- Skipping Setting Powder: Without a light dusting of translucent powder, especially under the eyes, concealer is prone to settling into fine lines and moving. A finely milled powder helps lock it in place.
- Using Too Much Powder: While crucial, excessive powder can also lead to a cakey or dry appearance, particularly in dry areas or for mature skin. Apply a thin layer with a fluffy brush, focusing only on necessary areas.
- Not Using Setting Spray: For overall longevity and to meld powders into a more skin-like finish, a setting spray can be invaluable. It also helps in preventing the makeup from looking flat or overly powdery.
By being mindful of these common mistakes and actively incorporating corrective measures, you can significantly elevate your concealer application. The goal is to make your concealer work for you, providing undetectable coverage that lasts, giving you the confidence that comes with a truly flawless complexion.
Integrating Concealer into Your Daily Makeup Routine
Concealer is a versatile makeup product that can seamlessly integrate into various makeup routines, from a minimalist “no-makeup” look to a full glam transformation. Understanding where and how to fit concealer application into your broader beauty regimen ensures it complements other products and contributes to a cohesive, polished final result. Its strategic placement in your routine can either serve as a quick fix or as a foundational element, setting the stage for the rest of your makeup.
The order of application particularly matters, impacting how well products layer and blend. Whether applied before or after foundation, the key is to ensure an effortless transition between steps, enhancing both coverage and longevity.
Concealer Before or After Foundation?
This is a long-standing debate in the beauty community, with valid arguments for both approaches. The best method often depends on your desired outcome and the type of foundation and concealer you are using.
- Concealer After Foundation: This is generally recommended for most people. Applying foundation first evens out overall skin tone and often provides some level of coverage for blemishes or redness, meaning you’ll need less concealer. This reduces product build-up and prevents a cakey look. Once your foundation is on, you can precisely identify and target remaining imperfections with your concealer.
- Concealer Before Foundation: This method works well for color correcting, where you apply a thin layer of color corrector (like green for redness or peach for dark circles) and blend it before applying foundation. However, applying regular concealer before foundation risks it being moved or sheered out by the foundation application, rendering it less effective.
Concealer for a Minimalist Look (No-Makeup Makeup)
For days when you want to look polished without a full face of makeup, concealer can be your secret weapon. It allows you to target specific areas of concern while letting your natural skin shine through everywhere else, creating an effortlessly fresh appearance.
- Targeted Application: Focus on areas that truly need coverage – usually under-eyes, around the nose for redness, and any visible blemishes.
- Blend with Fingertips or Small Sponge: Use the warmth of your fingertips or a small, damp sponge to blend the concealer seamlessly into your bare skin. The goal is to make it disappear, leaving only a hint of perfection.
- Set Lightly: A very light dusting of translucent powder in the T-zone or under-eye area can help set the concealer and reduce shine, maintaining a natural finish without looking overly made up.
Building a Full Glam Look with Concealer
In a full glam routine, concealer plays a much more extensive role, not just for covering but also for brightening, sculpting, and perfecting. It works in conjunction with foundation, contour, and highlight to create a flawless, multi-dimensional complexion.
- Strategic Highlighting: After foundation, choose a concealer 1-2 shades lighter than your skin tone and apply it to the high points of your face (under-eyes, bridge of nose, center of forehead, chin) to brighten and bring these areas forward.
- Precise Spot Concealing: Use a skin-matching concealer to cover any remaining imperfections that the foundation didn’t fully obscure, blending meticulously for an airbrushed finish.
- Layering and Setting: For a full glam look, layering is often involved. Apply thin layers of product and set each step carefully, using both setting powder and a setting spray to ensure longevity and a creaseless finish throughout the event.
No matter your preferred makeup style, integrating concealer thoughtfully into your routine is key to maximizing its benefits. By understanding its role in relation to other products and mastering precise application, you can achieve a consistently flawless complexion that feels natural and lasts all day.
Maintaining Your Flawless Finish Throughout the Day
Achieving a flawless look with concealer is one thing; sustaining it through the daily grind is another. Factors like oil production, environmental conditions, and accidental touches can contribute to concealer breaking down, creasing, or fading. To ensure your meticulous application withstands the test of time, strategic maintenance and touch-up techniques are essential. This proactive approach guarantees your complexion remains impeccable from morning to night, reducing the need for complete reapplication.
Preventative measures are just as important as corrective ones. Understanding how to interact with your makeup throughout the day minimizes disruptions and preserves your desired finish, ensuring your concealer continues to perform its magic effectively.
Preemptive Measures for Long-Lasting Wear
The longevity of your concealer begins with the initial application and the products you use. Setting yourself up for success involves considering product formulations and strategic layering alongside diligent skin preparation.
- Choose Long-Wear Formulas: Opt for concealers explicitly formulated for long wear, especially if you have oily skin or live in a humid climate. These formulas are designed to adhere better to the skin and resist smudging or fading.
- Oil Control Primers: If oiliness is a concern in areas where you apply concealer (e.g., T-zone or under-eyes for some), incorporate an oil-controlling primer. This creates a mattified base, reducing excess oil production that can break down concealer.
- Layering Techniques: As mentioned previously, applying thin layers and allowing each to set before adding more or moving to the next product (like powder) drastically improves wear time. This buildable approach is more durable than a single thick application.
Emergency Touch-Ups and Problem Solving
Despite best efforts, minor issues like creasing or fading can occur. Knowing how to efficiently address these without disrupting your entire makeup application is a valuable skill for maintaining a fresh look.
- Addressing Creasing: If concealer settles into fine lines, gently tap the area with a clean ring finger or a damp beauty sponge. The warmth and pressure help to smooth out the creases. Avoid adding more product unless absolutely necessary and only after smoothing the existing layer.
- Blotting Oil: For shininess or oil breakthrough, gently press blotting papers or a clean tissue onto the area. This absorbs excess oil without disturbing your concealer. Avoid rubbing, as this can remove the product.
- Minimal Reapplication: If touch-ups are needed for faded coverage, use a tiny amount of concealer and tap it onto the affected area. Blend meticulously, and if desired, lightly set with powder to secure the new layer.
Tools for On-the-Go Maintenance
Having the right tools readily available can make all the difference in quick touch-ups. A compact kit of essentials ensures you’re prepared for any minor complexion correction throughout your day.
- Compact Mirror: Essential for precise application and identifying areas that need attention.
- Mini Beauty Sponge or Compact Brush: For blending away creases or delicately dabbing on extra product. These are small enough to carry in a purse or makeup bag.
- Blotting Papers: Indispensable for absorbing excess oil without adding more product, ideal for mid-day shine control.
- Pressed Powder Compact: A touch of pressed powder can refresh your complexion, set any re-applied concealer, and minimize shine without the mess of loose powder.
By adopting these proactive maintenance strategies and being prepared for quick touch-ups, you can ensure your flawless concealer application remains impeccable from the moment you step out the door until your day concludes. It’s about empowering yourself to maintain confidence in your appearance, no matter what the day brings.
| Key Point | Brief Description |
|---|---|
| 🎨 Product Selection | Choose liquid for under-eyes, cream for blemishes, and specific tools like sponges for seamless blending. |
| ✨ Shade Matching | Match blemishes exactly, and use 1-2 shades lighter for under-eye brightening, considering undertones. |
| perfecting Application | Use inverted triangle for under-eyes, precise dabbing for blemishes, and gentle blending for all areas. |
| 🔒 Longevity Tips | Hydrate skin, apply thin layers, set with translucent powder, and use blotting papers for touch-ups. |
Frequently Asked Questions About Concealer
Generally, it’s recommended to apply foundation first. This evens out your skin tone and provides some coverage, reducing the amount of concealer needed. After foundation, you can more precisely identify and target remaining imperfections like dark circles or blemishes, minimizing product buildup and achieving a more natural look.
For dark circles, choose a concealer with a peach or orange undertone to neutralize blue/purple hues. Follow this with a shade that is 1-2 shades lighter than your natural skin tone or foundation to brighten the area. Always test shades on your face in natural light for the most accurate match.
To prevent creasing, ensure your under-eye area is well-hydrated before application. Apply concealer in thin layers, blending gently with a damp beauty sponge or your ring finger. Immediately after blending, lightly set the area with a finely milled translucent powder, either by baking briefly or gently pressing it into the skin.
For concealing blemishes, use a concealer that matches your skin tone exactly to avoid drawing attention to the spot. Apply a tiny amount directly onto the blemish using a small, firm brush or your fingertip. Gently tap and feather the edges outwards, blending seamlessly into the surrounding skin while keeping the center covered. Set with a light dusting of powder.
Yes, concealer can be an excellent tool for both highlighting and subtle contouring. For highlighting, use a concealer 1-2 shades lighter than your skin tone on areas you want to bring forward, like the bridge of your nose or cheekbones. For very subtle contouring, a shade 1-2 shades darker can be applied to create shadows, blended well for a natural effect.
Conclusion
Mastering concealer application transcends mere coverage; it is an art form that, when perfected, significantly elevates your overall makeup aesthetic. From understanding the nuanced differences between various formulations and tools to precisely matching shades and employing advanced techniques, each step contributes to achieving a truly flawless and lasting complexion. By diligently avoiding common mistakes and knowing how to seamlessly integrate concealer into your daily routine, US women can unmask their most confident selves, armed with the knowledge to maintain a pristine look, come what may. The ultimate reward is not just beautiful skin, but the empowered feeling of effortlessly polished perfection.


