Master the Perfect At-Home Manicure: A US Tutorial
Anúncios
Achieving a salon-quality manicure from the comfort of your home is entirely possible with the right tools, techniques, and a systematic approach, transforming your nail care routine into an empowering act of self-care tailored for the US beauty enthusiast.
Anúncios
In a world that often demands quick fixes and professional intervention, the art of self-care has resurfaced, with personal beauty rituals taking center stage. Among these, mastering how to do a perfect manicure at home: a US tutorial stands out as a highly sought-after skill. This guide is designed to empower you with the knowledge and techniques required to transform your nails from ordinary to extraordinary, all within the comfort and convenience of your own space. Forget expensive salon visits; with a little practice and the right approach, you can achieve stunning results that speak volumes about your attention to detail and personal style.
The Foundation: Understanding Your Nail Anatomy and Health
Before diving into the vibrant world of polishes and intricate designs, a truly perfect manicure begins with a deep understanding of your nails and their underlying health. Treating your nails with care and providing them with proper nutrients lays the groundwork for any cosmetic enhancement. Neglecting this crucial first step can lead to brittle nails, poor polish adhesion, and an overall unsatisfying result. Healthy nails not only look better but also serve as a canvas that elevates your manicure from good to exceptional.
Anúncios
Your nail is composed of several parts, each playing a vital role. The nail plate, the visible part we typically paint, sits atop the nail bed. The cuticle, often misunderstood, is a protective layer of skin at the base of the nail that seals the nail matrix from bacteria. Trimming it excessively can lead to infections. The free edge is the part of the nail that extends beyond the finger. Understanding these components helps in performing safe and effective manicure techniques, ensuring you’re working with your body, not against it.
Essential Nail Health Practices
Maintaining strong and healthy nails goes beyond simple maintenance; it’s about cultivation. Just like any other part of your body, your nails reflect your overall health. Diet, hydration, and protection all contribute significantly to their strength and appearance. Incorporating specific habits into your routine can make a considerable difference in the long run, setting the stage for truly impeccable manicures.
- Hydrate regularly: Drinking plenty of water benefits your entire body, including your nails, by keeping them flexible and less prone to breakage.
- Nourish from within: A balanced diet rich in biotin, vitamin E, iron, and zinc supports nail growth and strength. Consider supplements if your diet is lacking.
- Protect your hands: When performing household chores or gardening, wearing gloves shields your nails from harsh chemicals and physical trauma.
- Avoid harsh chemicals: Many cleaning products can strip natural oils from your nails, leading to dryness and brittleness.
Beyond these, recognizing signs of unhealthy nails—such as discoloration, unusual texture, or persistent brittleness—is key. If you notice any concerning changes, consulting a dermatologist is advisable. A professional can help identify underlying issues and recommend appropriate treatments, ensuring your nails are in optimal condition for any manicure. Ultimately, a perfect manicure isn’t just about what’s on the surface; it’s about the health that shines through.
By prioritizing the health of your nails, you are not only setting them up for a beautiful manicure but also practicing holistic self-care. This foundational step is often overlooked but is the secret to enduring beauty and strength. Remember, your nails are as indicative of your health as any other part of your body, so give them the attention they deserve before reaching for the polish.
Gathering Your Arsenal: Essential Tools and Products
Embarking on your journey to a perfect at-home manicure requires the right set of tools and products. Think of yourself as a meticulous artist preparing their palette; each item plays a specific role in creating your masterpiece. Investing in good quality implements not only makes the process smoother and more enjoyable but also contributes significantly to the final outcome and the longevity of your manicure. Poor quality tools can damage your nails or lead to an uneven application, undermining all your efforts.
A well-stocked manicure kit doesn’t need to be extensive, but it does need to be comprehensive. From shaping tools to nourishing treatments, each component is chosen for a specific purpose, collectively working towards achieving that coveted salon-quality finish. It’s about efficiency and effectiveness, ensuring every step contributes positively to the end result.
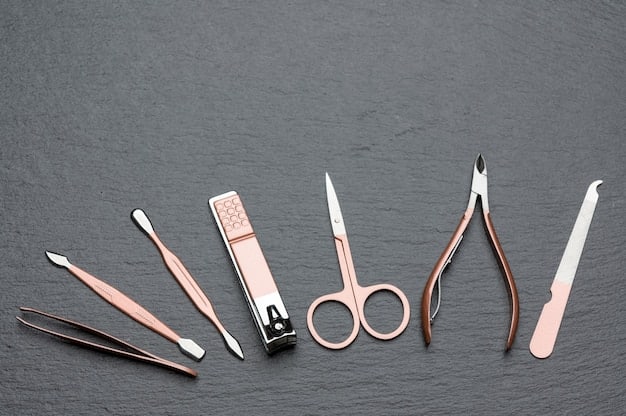
Must-Have Tools for Success
Selecting the correct tools is paramount. Much like a chef selects their knives, you’ll want to choose tools that are sharp, clean, and comfortable to handle. These are the instruments that shape, clean, and refine your nails, making precision and hygiene their most important attributes. Sterilizing your tools after each use is non-negotiable to prevent infections and maintain their effectiveness over time.
- Nail clippers or scissors: Opt for sharp, clean clippers suitable for your nail thickness.
- Nail file: Choose a fine-grit file to shape and smooth the edges without causing damage. Glass files are excellent for gentle shaping.
- Buffer: A four-sided buffer helps smooth ridges, buff the nail surface for shine, and prep for polish adhesion.
- Cuticle pusher: A metal or orangewood stick to gently push back cuticles.
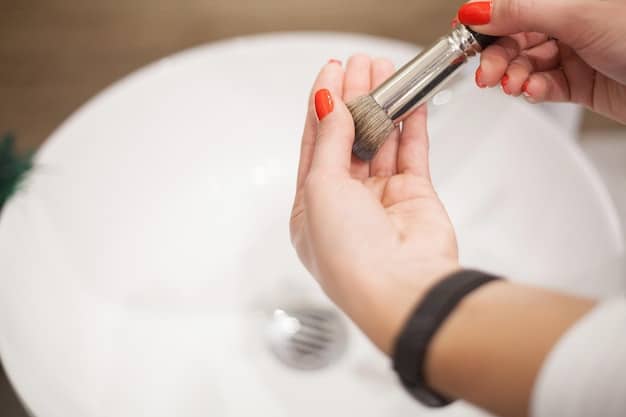
- Nail brush: For scrubbing nails and removing debris.
Beyond these basics, consider adding specialty tools like a cuticle nipper (use sparingly and with caution to only trim hangnails), a toe separator for pedicures, and a detail brush for nail art. Each tool, no matter how small, contributes to the overall precision and aesthetic of your manicure. It’s the small details that differentiate a good manicure from a truly perfect one.
Essential Products for a Lasting Manicure
The products you use are just as important as your tools. They protect, prepare, and enhance your nails, acting as the foundation and finish of your manicure. From the base coat that grips the polish to the top coat that seals it, each product has a role in durability and appearance. Understanding their functions helps you choose wisely and apply effectively for maximum impact.
- Nail polish remover (acetone-free is gentler): For clean removal without stripping natural oils excessively.
- Cotton pads or balls: For applying remover and cleansing.
- Cuticle oil: To hydrate and soften cuticles, improving nail health.
- Base coat: Creates a smooth surface, prevents staining, and helps polish adhere better.
- Nail polish (color of your choice): High-quality polish ensures even application and vibrant color.
- Top coat: Seals in color, adds shine, and prevents chipping.
- Hand cream/lotion: To moisturize hands and nails after the manicure.
For those seeking an even more professional touch, consider a clear polish with strengthening properties or a quick-dry spray. The synergy between quality tools and products is what truly elevates an at-home manicure, allowing you to achieve results that rival those from professional salons. Remember, your investment in these essentials is an investment in beautiful, healthy nails.
The Perfect Prep: Shaping, Soaking, and Cuticle Care
The preparation phase is arguably the most critical step in achieving a flawless home manicure. This is where you set the stage, ensuring your nails are perfectly clean, shaped, and ready to receive polish. Skipping or rushing through these steps can lead to an uneven application, premature chipping, and an overall less polished look. Patience and precision during prep are rewarded with a significantly improved final result that looks professional and lasts longer.
This phase involves careful shaping, a relaxing soak, and gentle, effective cuticle care. Each of these components contributes to the overall health and aesthetic of your nails, creating a smooth and uniform surface for your chosen color. Approaching this with a methodical mind ensures every detail contributes to the overall perfection of your manicure.
Shaping Your Nails to Perfection
Nail shaping is an art form. The shape you choose can significantly alter the appearance of your hands, making fingers look longer or balancing wider nail beds. Uniformity is key here; all nails should match in shape and length for a cohesive, refined look. Take your time, working gradually to avoid over-filing or creating an uneven edge that is difficult to correct. A good file is your best friend in this initial step, allowing for precise sculpting.
- Remove old polish: Start with clean nails to get a clear view of their natural shape.
- Trim if necessary: If nails are too long, trim them carefully with clippers, leaving a little length to file. Always cut straight across to prevent ingrown nails.
- File in one direction: File from the side of the nail towards the center, using long, smooth strokes. Avoid a back-and-forth “sawing” motion, which can cause splits and weakening.
- Choose your shape: Popular shapes include square, oval, round, almond, and coffin. Select a shape that complements your finger length and personal style.
- Smooth the edges: Once shaped, gently run the file over the free edge to ensure there are no sharp points or snags.
The goal is to create a clean, consistent canvas. Shaping your nails meticulously not only prepares them for polish but also contributes to their overall health by minimizing snags and breaks. This attention to detail in the shaping process forms the backbone of a successful at-home manicure, laying down the first layer of professionalism and care.
The Soothing Soak and Gentle Cuticle Care
A warm soak serves multiple purposes: it cleanses, softens the skin and cuticles, and prepares them for gentle manipulation. This step should be relaxing, like a mini spa treatment for your hands. It allows the cuticles to become pliable, making them easier to push back without causing damage. Resist the urge to aggressively cut your cuticles, as this can lead to irritation and infection. The aim is to nurture, not to remove completely.
- Prepare a warm water bath: Fill a small bowl with warm (not hot) water. Add a few drops of mild soap or a specialized nail soak for extra softening.
- Soak your nails: Immerse your fingertips for 5-10 minutes. This softens the cuticles and cleanses the nail plate.
- Gently push back cuticles: After soaking, gently push back the softened cuticles with a cuticle pusher. Use light, even pressure, moving towards the base of the nail. Remember, the cuticle protects the nail matrix, so be gentle.
- Trim hangnails only: If you have any unruly hangnails (pieces of skin detached from the cuticle), carefully snip them with a cuticle nipper. Never cut the living cuticle.
- Clean under nails: Use the tip of your cuticle pusher or a nail brush to gently clean any debris from under the free edge of your nails.
Following the soak and cuticle care, thoroughly dry your hands and nails. Ensure there’s no moisture left, as residual water can interfere with polish adhesion. This meticulous preparation sets the stage for a smooth, long-lasting polish application, ensuring your manicure looks pristine from start to finish. It’s these thoughtful preliminary steps that truly distinguish a perfect at-home manicure.
The Art of Application: Base Coat, Color, and Top Coat
With your nails meticulously prepped, the exciting part begins: applying the polish. This stage transforms your clean slate into a vibrant expression of your style. Achieving a smooth, even, and long-lasting finish depends heavily on the technique you employ for each layer—from the crucial base coat to the protective top coat. Patience and a steady hand are essential here; rushing can lead to smudges and an uneven appearance that detracts from the overall effort.
Each coat serves a unique purpose, contributing to both the aesthetic and durability of your manicure. This layered approach is what gives your at-home manicure a professional-quality finish, ensuring your color pops and stays chip-free for as long as possible. Understanding the role of each layer is key to mastering the art of application.
The Essential Base Coat
A base coat is more than just an extra step; it’s the foundation of your manicure. It creates a smooth, even surface for the color polish to adhere to, preventing staining of your natural nails, especially with darker shades. Moreover, it provides an adhesive layer that helps your polish last longer, minimizing chips and extending the wear time of your manicure. Skipping this step is a common mistake that can compromise the entire look and longevity.
- Apply thinly and evenly: Use one thin coat of base coat. Too thick, and it risks bubbling.
- Cap the free edge: Run the brush along the very edge of your nail, horizontally, to “cap” it. This seals the tip and helps prevent chipping.
- Allow to dry completely: Wait 1-2 minutes for the base coat to become tacky but not wet. This creates the ideal surface for color adhesion.
A good base coat can also offer additional benefits, such as nail strengthening or ridge filling, depending on the product. Choose one that addresses your specific nail concerns. This foundational layer is your first line of defense against the elements and ensures your chosen color looks its best.
Mastering the Color Application
Applying the color polish is where your manicure truly comes to life. The key to a professional finish lies in thin, even coats and precise strokes. Resist the temptation to apply one thick coat, as this often leads to a streaky finish, longer drying times, and increased susceptibility to smudges and chips. Building up the color gradually yields a more vibrant and enduring result, demonstrating true mastery.
- Shake the bottle gently: Roll the bottle between your palms instead of shaking vigorously to avoid air bubbles.
- First coat: Start with a strip of polish down the center of the nail, from base to tip. Then, do a stroke on either side, covering the nail evenly.
- Keep coats thin: Aim for two to three thin coats for opaque coverage. Lighter colors may require more, darker colors often less.
- Cap the free edge (again): Repeat the capping step with each color coat to reinforce chip resistance.
- Allow drying time between coats: Wait 2-5 minutes between each color coat. The polish should be dry to the touch before applying the next layer.
Take your time and apply polish systematically, nail by nail. If you make a mistake, have a small brush dipped in nail polish remover ready to clean up the edges. Precision in application ensures a clean, salon-quality look, making your nails look impeccably done rather than hastily painted. This patience is what sets apart a beautiful home manicure.
The Protective Top Coat
The top coat is the grand finale of your manicure. It seals in the color, adds a brilliant shine, and significantly increases durability by protecting against chips, scratches, and fading. A good top coat can extend the life of your manicure by several days, making it an indispensable step in achieving long-lasting results. Just like the base coat, a thin, even application is crucial to avoid bubbling or prolonged drying times.
- Apply a generous, but not thick, layer: Ensure complete coverage over the entire nail, from base to tip.
- Cap the free edge (for the final time): This final capping reinforces the seal and extends wear.
- Quick-dry top coats: Consider a quick-dry top coat if you’re prone to smudging.
- Reapply every few days: For extra longevity and shine, consider applying a thin layer of top coat every 2-3 days, especially if you’re hard on your hands.
After applying the top coat, allow ample time for your nails to dry completely. While quick-dry formulas help, full curing can take up to an hour or more. Resist the urge to touch or use your hands extensively during this period. The perfect application leads to a perfectly polished and protected manicure, showcasing your effort and attention to detail beautifully.
Drying and Finishing Touches: Ensuring Longevity and Shine
After the meticulous application of base, color, and top coats, the drying phase becomes paramount. This is where the polish truly sets and hardens, determining the longevity and ultimate finish of your manicure. Rushing this step is the most common cause of smudges, dents, and chips, undoing all your careful work. Patience truly is a virtue here. Beyond simple drying, the finishing touches elevate your manicure from merely painted nails to a polished, professional statement, enhancing both appearance and resilience.
Proper drying techniques combined with hydration and attention to detail post-polish application mean the difference between a manicure that lasts for days and one that chips within hours. It’s about protecting your investment of time and effort, ensuring your beautiful nails stay that way.
The Crucial Drying Process
While quick-dry top coats accelerate the surface drying, the layers underneath still require time to fully cure and harden. This internal drying, or “curing,” prevents bubbling and ensures the polish is robust enough to withstand daily activities. Different brands and polish types will have varying drying times, so understanding the nuances is key. Ambient temperature and humidity can also play a role, with cooler, drier environments generally being more conducive to quicker drying.
- Air dry naturally: The most gentle method is to simply let your nails air dry. Avoid fans or blowing on your nails, as this can introduce bubbles or lift the polish.
- Use quick-dry drops or sprays: These products form a protective, slick layer that prevents smudges while the polish underneath cures. They can significantly reduce surface drying time but don’t eliminate the need for careful handling.
- Cold water immersion (with caution): Some swear by dipping freshly polished nails into a bowl of ice water for a few minutes. This can help set the polish, but ensure the polish is slightly tacky first to prevent wrinkling.
- Avoid heat: Heat can prevent polish from hardening properly and cause bubbling. Avoid hot showers, dishwashing, or hair dryers immediately after painting.
During the drying period, be mindful of your hand movements. Engage in activities that require minimal finger use, or simply relax. Fully dry nails are resilient nails, ready to take on the world without immediate signs of wear. This patience ensures that your manicure’s beauty is preserved and truly lasts.
The Perfect Finishing Touches
Once your nails are completely dry, the final touches enhance their beauty and nourish the surrounding skin. These steps are often overlooked but are essential for a complete, salon-quality look. They address any minor imperfections and ensure your hands look as pristine as your nails, providing a cohesive and polished appearance. It’s the small details that make a significant impact on your overall presentation.
- Clean up edges: Use a flat, angled brush dipped in non-acetone polish remover to meticulously clean up any polish that has gotten onto your skin. This creates a crisp, professional edge.
- Apply cuticle oil: Massage a drop of cuticle oil into each cuticle and nail bed. This hydrates the skin, keeps cuticles soft, and promotes healthier nail growth.
- Moisturize hands: Apply a rich hand cream or lotion to your entire hands, massaging it in until absorbed. This final hydration step leaves your hands feeling soft and looking supple.
- Consider reapplication of top coat: If you desire extra shine or protection, a very thin layer of top coat can be applied every 2-3 days, especially if you use your hands frequently.
These finishing touches not only perfect your manicure’s appearance but also contribute to the long-term health of your nails and hands. They complete the self-care ritual, leaving you with a sense of accomplishment and beautifully maintained nails. Each step, from prep to polish to finish, plays a vital role in achieving the perfect at-home manicure, giving you salon-worthy results without the salon price tag.
Troubleshooting Common Manicure Mishaps and Maintenance Tips
Even with the most careful application, manicure mishaps can occur. From smudges and bubbles to quick chipping, addressing these issues effectively can save your manicure from disaster. Moreover, understanding how to properly maintain your nails post-manicure is key to extending its life and keeping them looking fresh. A perfect manicure isn’t just about flawless application; it’s also about effective damage control and proactive care.
This section provides practical solutions to common problems and offers actionable advice for preserving your hard work. Knowing these tricks can turn potential frustration into a minor setback, helping you maintain a polished look for longer and ensuring your efforts are rewarded with lasting beauty.
Solving Common Manicure Problems
Mistakes happen, but most are easily fixable with the right approach. Don’t despair if your polish bubbles or smudges; there are quick remedies that can salvage your manicure. Prevention is always better, but knowing how to react instantly can rescue your nails from looking less than perfect, allowing you to enjoy your beautiful color without interruption.
- Smudged polish: If a smudge occurs while the polish is still wet, gently smooth it out with your fingertip, then apply a tiny dab of fresh polish, and top with a top coat. If dry, dab a tiny amount of non-acetone remover on a brush and carefully smooth it, then reapply top coat.
- Bubbles in polish: Bubbles usually indicate too-thick coats or shaking the bottle vigorously. Prevent by applying thin layers and rolling the bottle. To fix, you might need to remove and restart, or apply an extra top coat to smooth over minor bubbles.
- Streaky application: Often due to too few coats, uneven application, or expired polish. Ensure thin, even coats and consider adding an extra layer.
- Polish staining nails: Prevent this by always using a base coat. If staining occurs, a lemon juice and baking soda paste can help lightly bleach nails.
Addressing these issues swiftly can prevent a minor hiccup from ruining your entire manicure. Developing a keen eye for detail and learning quick corrective techniques are invaluable skills for any at-home manicure enthusiast, ensuring that your nails always look their best.
Extending the Life of Your Manicure
Once your manicure is complete, protecting it becomes the next priority. Daily activities can be surprisingly harsh on your nails, but with a few simple habits, you can significantly extend the life of your polish without constant touch-ups. These maintenance tips focus on reinforcing the polish and protecting your nails from everyday wear and tear, allowing you to enjoy your beautiful manicure for longer.
- Wear gloves for chores: When washing dishes, cleaning with chemicals, or gardening, wear gloves. Water and harsh chemicals can lift polish and dry out nails.
- Reapply top coat every few days: A thin layer of top coat every 2-3 days refreshes the shine and adds an extra protective barrier against chips. This is a game-changer for longevity.
- Hydrate cuticles daily: Regularly apply cuticle oil to keep your cuticles soft and your nails flexible. Dry nails are more prone to chipping.
- Be gentle with your nails: Avoid using your nails as tools (e.g., opening cans, scraping labels). This puts undue stress on the polish and nail.
- Avoid excessive hot water exposure: Long hot showers or baths can cause polish to expand and contract, leading to cracking and chipping.
By incorporating these simple maintenance tips into your routine, you can significantly extend the life and beauty of your at-home manicure. It’s about being proactive and treating your nails with the care they deserve, ensuring your efforts in achieving that perfect manicure are rewarded with lasting results. A little ongoing attention goes a long way in preserving your polished look.
Advanced Techniques & Trends: Elevating Your At-Home Manicure
Once you’ve mastered the basics of a perfect at-home manicure, why stop there? The world of nail art and advanced techniques offers endless possibilities to express your creativity and elevate your nail game. From subtle embellishments to bold designs, exploring these avenues can transform your nails into miniature canvases, reflecting your personality and style. This is where your at-home manicure truly becomes a form of self-expression, moving beyond simple color application to artistic creation.
Staying abreast of current trends and experimenting with new tools or methods can keep your manicures fresh and exciting. These advanced techniques, while requiring a bit more practice and patience, are incredibly rewarding, allowing you to produce salon-quality designs right in your living room. It’s an invitation to explore your artistic side and redefine what an “at-home” manicure can truly be.
Exploring Nail Art Basics
Nail art might seem intimidating, but many popular designs use simple techniques and readily available tools. Starting with basic patterns and slowly building up your skill can lead to impressive results. The key is to start small, be patient, and practice, practice, practice. Even a simple accent nail can add a significant flair to your overall manicure, making it unique and eye-catching.
- Dotting tools: Essential for creating polka dots, small flowers, or precise placements of gems. Start with simple dot patterns.
- Striping tape/brushes: For clean lines and geometric designs. Lay down tape after the base color is dry, paint over, then remove the tape carefully.
- Sponging for gradients: Use a makeup sponge to dab on different colors for an ombre effect.
- Stamping kits: For intricate designs without freehand drawing. These kits use plates with etched designs that transfer to your nail.
For more complex designs, consider investing in fine detail brushes. Watching online tutorials can also provide immense inspiration and practical guidance. Remember, nail art is about enjoyment and self-expression, so have fun with it and don’t be afraid to experiment. Your nails are your canvas, and there’s no limit to what you can create.
Keeping Up with US Nail Trends
The beauty industry, particularly nail fashion, is constantly evolving. Staying informed about current trends can inspire your next manicure and keep your style fresh. From seasonal color palettes to popular finishes, integrating these trends can make your at-home manicures look current and chic. US trends often blend practicality with playful aesthetics, offering a broad spectrum of styles to suit various tastes.
- Seasonal colors: Embrace hues that reflect the current season (e.g., pastels for spring, deep jewel tones for fall).
- Finishes: Experiment with matte top coats, glitter toppers, or iridescent polishes for different effects.
- Minimalist designs: Often featuring negative space, subtle lines, or single dots for an understated yet chic look.
- Chrome and metallic effects: Achieve a futuristic look with specialized powders or polishes.
- French manicure variations: Classic with a twist—think colored tips, glitter tips, or even asymmetrical designs.
Beyond learning new techniques and embracing trends, remember that the most beautiful manicure is one that reflects your personal style. It’s about confidence and joy in your self-expression. By continuously exploring and adapting, your at-home manicure can remain a dynamic and rewarding aspect of your beauty routine, proving that professional results are well within your reach.
| Key Step | Brief Description |
|---|---|
| 💅 Nail Health | Understand nail anatomy & prioritize hydration/nutrition for strong, healthy nails, key for any manicure. |
| 🛠️ Tool Selection | Invest in quality clippers, files, buffers, and polishes; hygiene ensures safety and effective application. |
| prepping Nails | Shape nails, gently soak and push back cuticles to create a clean, uniform canvas for polish. |
| 🎨 Polish Application | Apply thin, even coats of base, color (2-3 layers), and top coat, capping the free edge for longevity. |
Frequently Asked Questions About At-Home Manicures
The ideal frequency for an at-home manicure depends on your nail growth, polish durability, and personal preference. Generally, every 5-7 days is a good timeframe to remove old polish, re-evaluate nail health, and apply fresh color. This allows for consistent cuticle care and prevents nail fatigue from constant polish. Listen to your nails and adjust as needed.
Yes, absolutely! Regular nail polish is perfectly suitable for use on toenails for a pedicure. The application process, including base coat, color, and top coat, remains the same. Just ensure your toenails are clean, properly shaped, and buffed prior to polish application for the best adhesion and longest-lasting results. Consider using toe separators for easier application.
To prevent chipping, always start with a clean, dry nail surface. Use a high-quality base coat to improve adhesion and a long-wearing top coat, reapplying it every 2-3 days for extra durability. “Capping” the free edge of your nail with each coat is crucial. Additionally, wear gloves during household chores involving water or chemicals to protect your manicure.
While not strictly necessary for everyone, gently pushing back cuticles creates a cleaner, more spacious nail plate for polish application, resulting in a neater finish. It’s important to be gentle and avoid cutting them, as cuticles protect your nail bed from infection. If you prefer to skip, ensure your nails are thoroughly cleaned around the cuticle area. Hydration is key.
To speed up drying, apply thin layers of polish, allowing each to dry slightly before the next. Investing in a quick-dry top coat is highly effective. You can also use quick-dry nail drops or sprays, which create a protective film preventing smudges. Immersing nails in ice water for a few minutes after the top coat is also a popular method for setting polish faster.
Conclusion
Mastering the art of the perfect at-home manicure is a rewarding journey that blends self-care with creative expression. By understanding the foundational steps, investing in quality tools and products, and practicing patience with each application, you can consistently achieve salon-quality results without ever leaving your home. From proper nail preparation and precise polish application to effective drying and thoughtful maintenance, every detail contributes to a beautiful, long-lasting finish. Embrace this skill as not just a beauty routine, but an empowering act of personal care that allows you to showcase your style with confidence and flair, proving that true elegance starts at your fingertips.


